Ferrum
Step 1
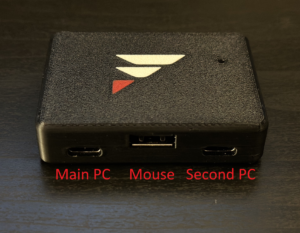
With the USB ports facing you, plug in cables like this:
Left USB C Port: Main PC (Use a motherboard port, not a case port)
Middle USB A Port: Your Mouse
Right USB C Port: Second PC
Step 2
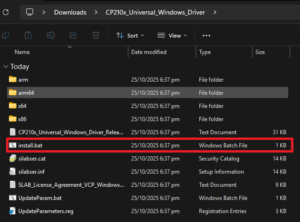
Install the CP210x Driver package for Windows by extracting the contents of the attached zip file, and running install.bat
Step 3
Install the Ferrum app
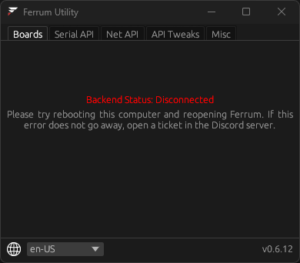
Note: If you get a Backend Status: Disconnected error after installing, try rebooting your pc, and/or reopening the Ferrum app.
Step 4
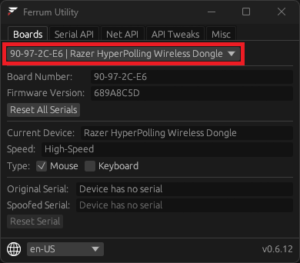
If everything was successful, you should be able to view your connected Ferrum board(s) in the Boards tab.
Step 5
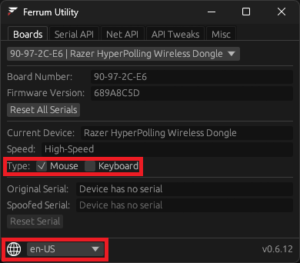
If your device is your main keyboard, select it as only a Keyboard. If it is your main mouse, select it as a Mouse (the default option). If it is both your main mouse and keyboard, meaning they both share the same USB receiver/dongle, you can select both Mouse and Keyboard options. Also, you can change your language in the bottom left corner of the app
Step 6
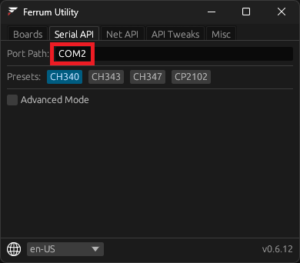
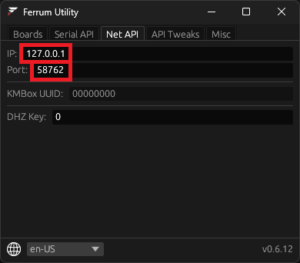
Finally, to connect your provider’s software to Ferrum, simply use the COM Port in the Serial API tab, or the IP address and port in the Net API tab. View the #connecting-software-guide for more information.